Kayak Wall Mounts: Sturdy Space-Efficient Storage Solutions
Key Takeaways
- Wall-mounted kayak storage is a space-efficient solution that keeps your kayak off the ground and protected.
- It’s crucial to choose a wall mount that can handle the weight and size of your kayak for safety and longevity.
- Installing a kayak wall mount is a straightforward process that requires basic tools and attention to detail.
- Organizing multiple kayaks is easier with wall mounts, allowing for a tidy and accessible setup.
- Additional accessories like paddle holders and gear hooks can further enhance your storage system.
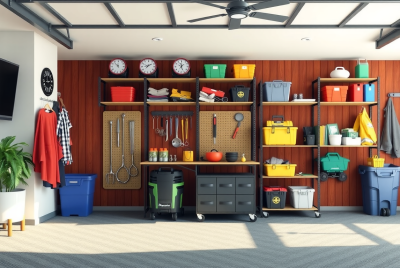
As a kayak enthusiast, you know the joy of gliding through the water, the peace of a quiet lake, or the thrill of a challenging river. But when the adventure ends, and you’re back on dry land, the question arises: where do you store your trusty vessel? That’s where kayak wall mounts come into play. These sturdy, space-efficient solutions not only save you precious floor space but also keep your kayak safe from harm.
Let’s dive into the world of kayak wall storage solutions, which can transform your garage, shed, or any storage space into a well-organized haven for your kayaking gear.
Kayak Wall Mounts: The Game-Changer in Gear Organization
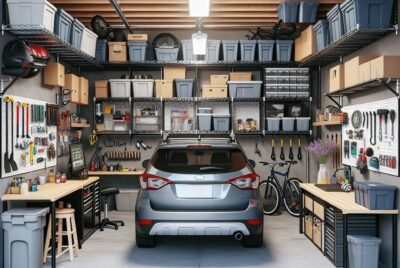
If you’ve ever tripped over your kayak on the garage floor or struggled to lift it onto a high shelf, you’ll understand the beauty of a good wall mount. These devices allow you to store your kayak against the wall, horizontally or vertically, freeing up floor space for your car, tools, and other outdoor gear.

“TCMT 2Pairs Kayak Wall Mount Storage …” from www.walmart.com
Space Saving by Design
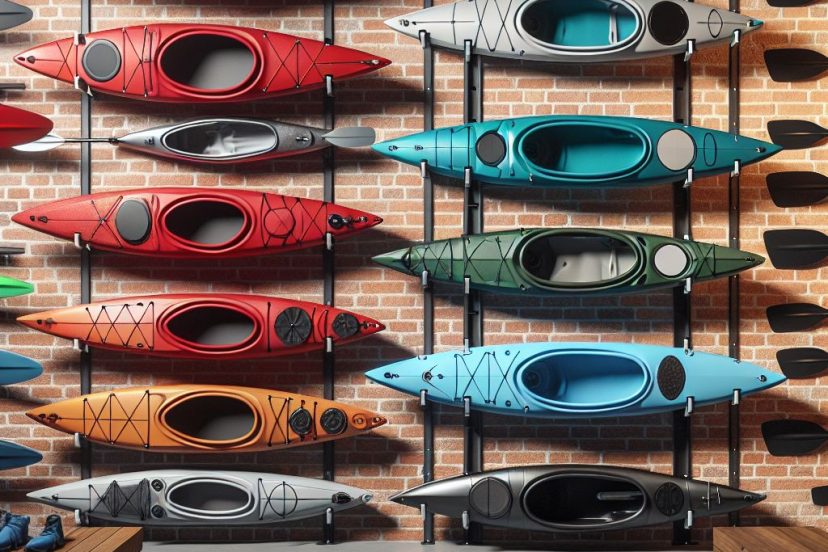
Wall mounts come in various shapes and sizes, but they all serve the same purpose: to keep your kayak off the ground and out of the way. This not only saves space but also protects your kayak from potential damage. Whether you opt for padded brackets, J-cradles, or sling systems, they all ensure your kayak is secure and easily accessible.
Versatility for Various Kayak Models
No matter the size or shape of your kayak, there’s a wall mount that can accommodate it. From sleek racing models to bulky fishing kayaks, the right wall mount can handle the job. Some are even adjustable, allowing for a custom fit that cradles your kayak perfectly.
Choosing the Right Kayak Wall Mount
Assessing Your Available Space
Before you pick a wall mount, take a good look at the space you have available. Consider the height of your ceilings, the amount of wall space, and how easily you can access the area. You’ll want to ensure that there’s enough room to not only mount the kayak but also to remove it without playing a game of Tetris each time.
Matching Mounts to Kayak Weight and Size
Each kayak wall mount has a weight limit, and it’s vital to choose one that can support your kayak’s heft. Check your kayak’s specs and compare them to the mount’s capacity. Size matters too – a mount that’s too small or too large can lead to instability or difficulty in loading and unloading your kayak.
Material Matters: Durability and Protection
When selecting a wall mount, you want materials that are both durable and gentle on your kayak. Powder-coated steel or heavy-duty plastic can withstand the weight, while foam padding or rubber sleeves protect your kayak’s finish. It’s a balance of toughness and tenderness, like a bear hugging a kitten.
Step-by-Step Installation Guide
Installing a kayak wall mount is a task that, with a little bit of know-how and some elbow grease, can be accomplished by most DIYers. I’ll guide you through the process, ensuring that your kayak will be hanging safely in no time. So, roll up your sleeves, and let’s get to work!
Tools You’ll Need
Gather your tools, and let’s make sure we’re ready. You’ll need:
- A power drill for making pilot holes.
- A stud finder to locate solid mounting points.
- A level to ensure your kayak hangs straight.
- A tape measure for precise placement.
- The hardware that came with your mount, usually screws and wall anchors.
Having the right tools at the ready will make the installation process smoother and faster. Plus, it’ll give you that satisfying feeling of being a true handy-person, ready to tackle anything.
Finding the Perfect Spot: Wall Studs and Location
- Use a stud finder to locate the studs in your wall – these will be your anchor points.
- Ensure the location is easily accessible for loading and unloading your kayak.
- Measure the space to fit your kayak and avoid placing the mount too high or too low.
Choosing the right spot for your kayak wall mount is crucial. You want a place that’s out of the way of daily activities but still easy to access when it’s time to hit the water. Use a stud finder to locate the studs in your wall. These solid wood beams are the key to a secure mount, as they can handle the weight of your kayak far better than drywall alone.
Measure the length of your kayak and the height at which you’d like it to hang. Keep in mind that you’ll need to lift the kayak to this height, so don’t place it too high. On the flip side, hanging it too low could make it a trip hazard. Find that sweet spot, usually about chest height, for easy loading and unloading.
Once you’ve found the perfect location, mark the spots where the screws will go. Use a level to ensure everything is straight – a wonky mount could lead to an unstable kayak.
Actual Mounting: Screws, Brackets, and Anchors
With your location marked and your tools in hand, it’s time to secure the mount to the wall. Start by drilling pilot holes into the studs at the marked locations. If your mount came with wall anchors, insert them into the holes. These little devices expand within the wall, providing extra hold for your screws.
Next, align the brackets of your wall mount with the pilot holes and start screwing them in. Go slowly to ensure a tight fit and avoid stripping the screws. Once the brackets are firmly attached to the wall, give them a tug to test their sturdiness. You want absolute confidence that they can hold your kayak’s weight without budging.
Securing the Kayak: Straps and Safety Checks
With the mount in place, it’s time to hang your kayak. If your mount has straps, loop them around the kayak and secure them tightly. These straps act as a safety net, ensuring that even if the kayak is bumped or jostled, it won’t come tumbling down. For more storage solutions and tips on securing items in your garage, be sure to check out our resources.
Give your kayak a gentle shake to test the stability of the setup. Check that the mount doesn’t wobble and that the kayak sits evenly within the cradle or straps. Safety is paramount, so take your time with these checks.
Maximizing Your Storage with Wall Mounts
Now that your kayak is safely mounted on the wall, let’s talk about maximizing this storage solution. If you have multiple kayaks, you can line them up along the wall or even stack them vertically with tiered mounts. The key is to maintain easy access to each kayak without having to move the others.
Consider adding additional accessories to your setup:
- Paddle holders can be mounted beside or below your kayak for a tidy look.
- Gear hooks are perfect for hanging life vests, helmets, and other paddling gear.
With a little planning and the right equipment, your kayak storage area can be as streamlined and efficient as a professional outfitter’s. And there’s nothing quite like the satisfaction of seeing your gear organized and ready for your next adventure.
Stay tuned for the final part of this article, where we’ll discuss additional tips for organizing multiple kayaks and how to further enhance your storage system with handy accessories. We’ll make sure your kayak storage is not only functional but also a showcase of your love for the sport.
Actual Mounting: Screws, Brackets, and Anchors
Now that you’ve marked your spot and gathered your tools, it’s time to bring everything together. Hold the bracket against the wall, lining up the holes with your marks. Drill in the screws through the bracket and into the studs. If your wall is masonry, you’ll need to use a hammer drill and wall anchors. For drywall, toggle bolts can provide a secure hold. Tighten each screw until the bracket feels solid against the wall – this is what’s going to support your kayak, so it needs to be sturdy.
Securing the Kayak: Straps and Safety Checks
With the mount securely attached to the wall, you’re almost ready to hoist your kayak up. If your mount comes with straps, thread them through the designated areas on the mount. Carefully lift your kayak and place it into the mount. Pull the straps over the kayak and buckle or tie them securely. Give the kayak a little nudge to ensure it’s seated well in the mount and the straps are holding it firmly in place. You don’t want any surprises when you’re grabbing your kayak for an early morning paddle.
- Lift the kayak into the wall mount.
- Thread the straps over and around the kayak.
- Secure the straps with the provided buckles or ties.
- Perform a safety check by gently nudging the kayak to ensure it’s secure.
Remember, safety is your number one priority. Double-check that everything is secure before you call it a day. A well-secured kayak means peace of mind, and it ensures that your kayak will be ready and waiting for your next paddling adventure.
Now that your kayak is safely up and out of the way, let’s talk about how you can maximize this new storage solution.
Maximizing Your Storage with Wall Mounts
Wall mounts are a fantastic way to store your kayak, but they can do so much more. By thinking vertically, you can free up floor space and create a more organized and efficient storage area. With your kayak mounted, you’ll have extra space for other gear, or simply to move around more freely. It’s about creating a functional space that caters to your passion for kayaking.
Organizing Multiple Kayaks Efficiently
If you’re the proud owner of multiple kayaks, wall mounts can be a game-changer. Install additional mounts above or beside each other, depending on the space you have. Make sure each kayak has enough clearance for easy removal. For families or those with a variety of kayaks, labeling each mount can also help keep things organized. That way, you can grab your kayak and go, without any mix-ups or delays.
Incorporating Accessories: Paddle Holders and Gear Hooks
With your kayaks up on the wall, don’t forget about your paddles and gear. Install paddle holders next to your kayak mounts to keep paddles out of the way and prevent them from becoming trip hazards. Gear hooks are perfect for hanging life jackets, helmets, and spray skirts. By keeping all your gear in one place, you’ll streamline your prep time before hitting the water.
Consider adding a shelf above or below your kayak mount for smaller items like gloves, waterproof cases, or your favorite waterproof speaker. You could even mount a small bin for things like sunscreen, insect repellent, and other essentials. The key is to create a space where everything has its place.
*We may earn a commission for purchases made using our links. Please see our Disclosure to learn more.